
Coding the First Program
Reminder: if you are using Arduino Uno or Arduino Mega boards you will need to select the correct board type under the tools drop down menu. You will also need to connect the USB cable and select the corresponding “COM port” under the tools drop down menu.
Copy the following code into your Arduino interface and attach an LED to pin 7 on your Arduino board if it hasn’t got one already. Some of the instructions will change colour, you can compare yours to the actual code at the Check Your Code link below to make sure it has been copied correctly.
* Writing after the // is irrelevant to the function of the code and is for clarification and annotation only.
**Terms are case sensitive. If the colour does not match the check your code example it could be a syntax error.
_________________________________________________________________________
//Pin 7 needs to have an LED attached to it
//Give “7” a name – in this case, led
int led = 7;
//the setup routine runs once when you press reset
void setup() {
//initialise the digital pin as an output – pins
//by default are inputs
pinMode(led,OUTPUT);
}
//the loop routine runs over and over again forever
void loop() {
digitalWrite(led, HIGH); //turn the LED on (HIGH is the voltage level)
delay(1000); //wait for one second
digitalWrite(led, LOW); //turn the LED off by making the voltage LOW)
delay(1000); //wait for one second
}
_________________________________________________________________________
Connect an LED to Pin 7. Verify your code using the tick icon (top left) and then upload to the board by clicking on the arrow icon (top left, next to the tick icon)
Extension Tasks – Once you have your code working try and make the following changes.
Can you change the code to make the LED flash faster?
Can you make it flash slower?
Can you add another LED?
Can you make them flash alternatively?
Create a circuit and attach an LED to pin 7 on the Arduino board
Copy the text below into the Code Text section.
* Writing after the // is irrelevant to the function of the code and is for clarification and annotation only.
**Terms are case sensitive. Using upper or lower case incorrectly, or misspelling a work, will cause a syntax error.
_________________________________________________________________________
//Pin 7 needs to have an LED attached to it
//Give “7” a name – in this case, led
int led = 7;
//the setup routine runs once when you press reset
void setup() {
//initialise the digital pin as an output – pins
//by default are inputs
pinMode(led,OUTPUT);
}
//the loop routine runs over and over again forever
void loop() {
digitalWrite(led, HIGH); //turn the LED on (HIGH is the voltage level)
delay(1000); //wait for one second
digitalWrite(led, LOW); //turn the LED off by making the voltage LOW)
delay(1000); //wait for one second
}
_________________________________________________________________________
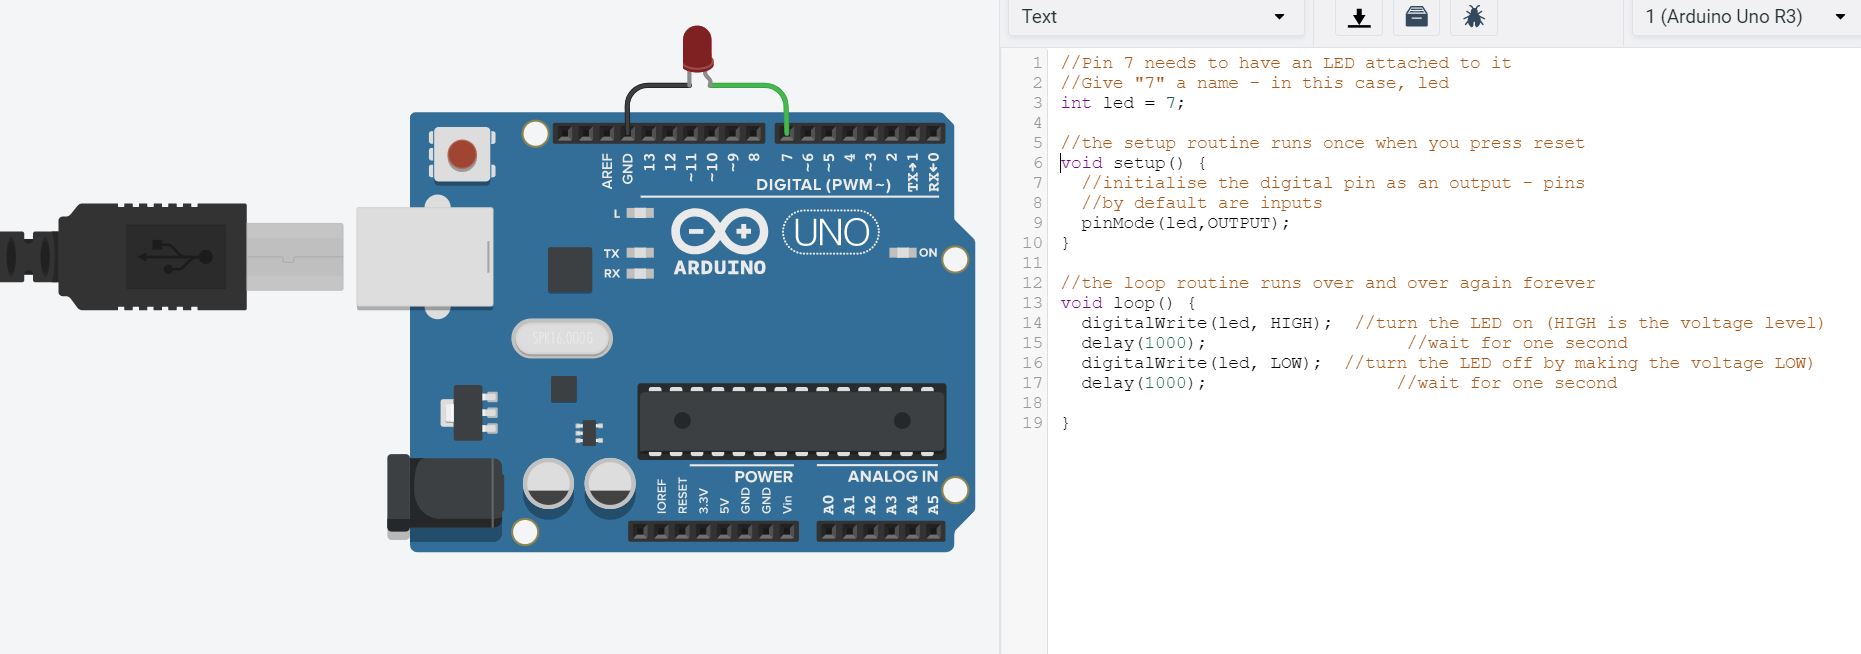
Your screen should now look something like the picture below
Extension Tasks – Once you have your code working try and make the following changes.
Can you change the code to make the LED flash faster?
Can you make it flash slower?
Can you add another LED?
Can you make them flash alternatively?
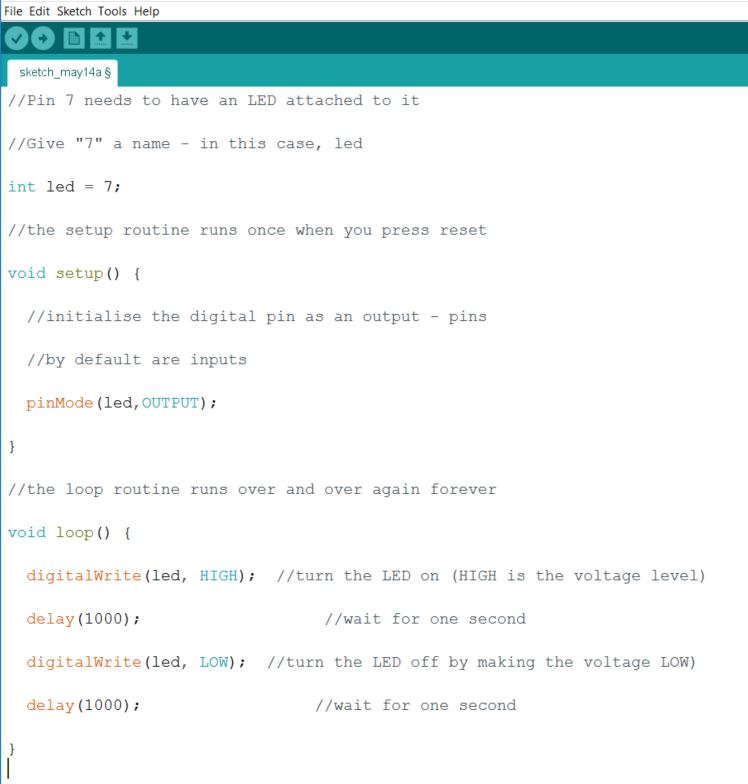
Compare your code to the one below, you should have a page that looks something like this.
- To make the LED flash faster just change the delay from 1000 milliseconds to a shorter time eg. delay (100); note very short delays eg. 10 milliseconds will appear as if the LED is staying on as the human eye will not notice the on and off phase.
- To slow the LED flash down simply increase the delay readings to a larger number eg. delay (3000);
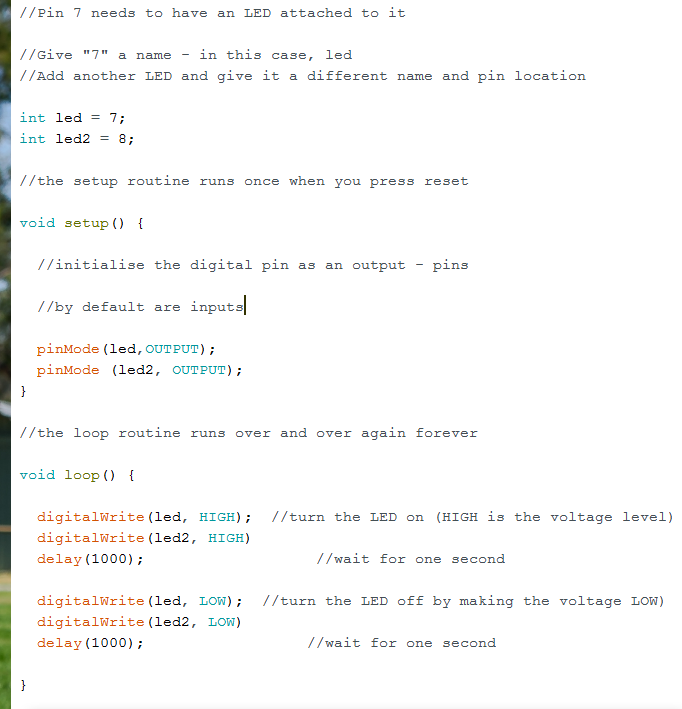
- When adding another LED you will need to change the code in several places. Spot the difference in the answer below.
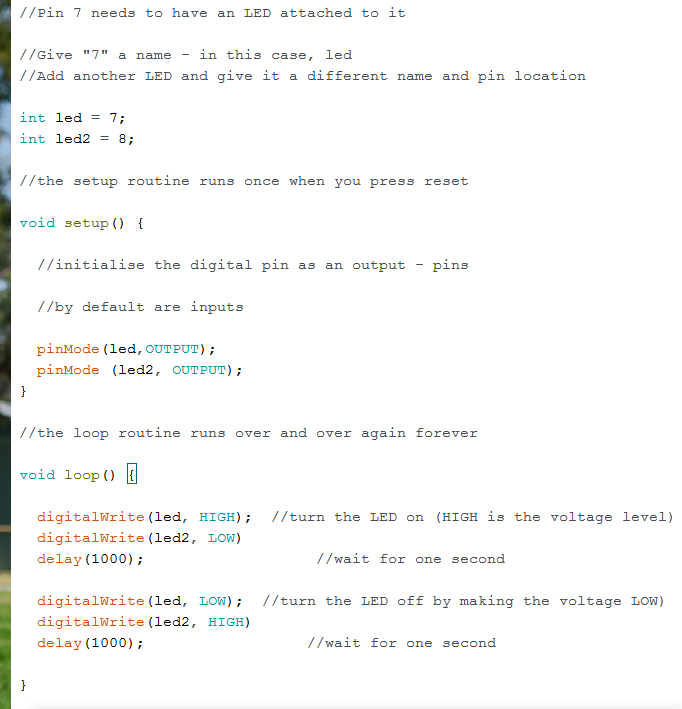
Making the LED flash alternately requires the high and low states to be opposite for the two LEDs. See the code below for an example of alternating LED flashes.
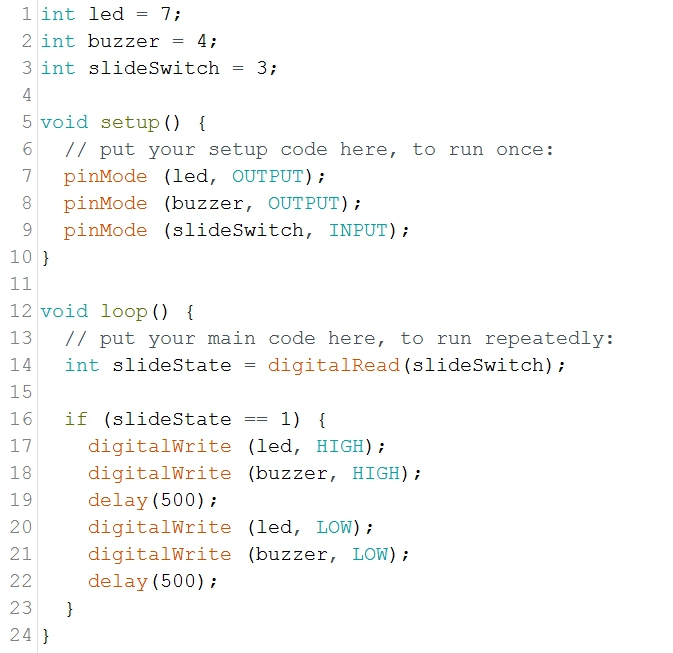
Now let’s try 2 outputs at once.
Type the following code into the Arduino Software IDE – ensure the words with syntax highlighting change colour on your screen as displayed below. Ensure you look out for correct case (e.g. OUTPUT, pinMode, digitalWrite, etc.) and semi-colons.
Questions.
Suggest why this code does not need the if… else statement
When would you need to add the else statement?
How do we make the LED and Buzzer stay on longer or shorter?
Can you make the LED and Buzzer alternate (that is, LED on and Buzzer off, then LED off and Buzzer on)?
What additional lines of code would be needed to add another LED to this program?